Connected Consumer Fuel – Smart Oil Gauge – Install & Day 01
In our home we have an oil tank in the basement and its current gauge is a float that sometimes sticks. We do have an automated delivery system with our Home Heating Oil Provider so they delivery when they “think” we should be low and fill up when its most economical to send a truck ( over 100 Gallons ).
The Smart Oil Gauge showed up in my news feed as a using the ESP series chipset which is an incredibly small, powerful enough SoC (System On Chip) that I’ve been interested in using for some home projects.
In order to get into the guts of how and what this group has implemented I’d need to obtain one in order to learn about it.
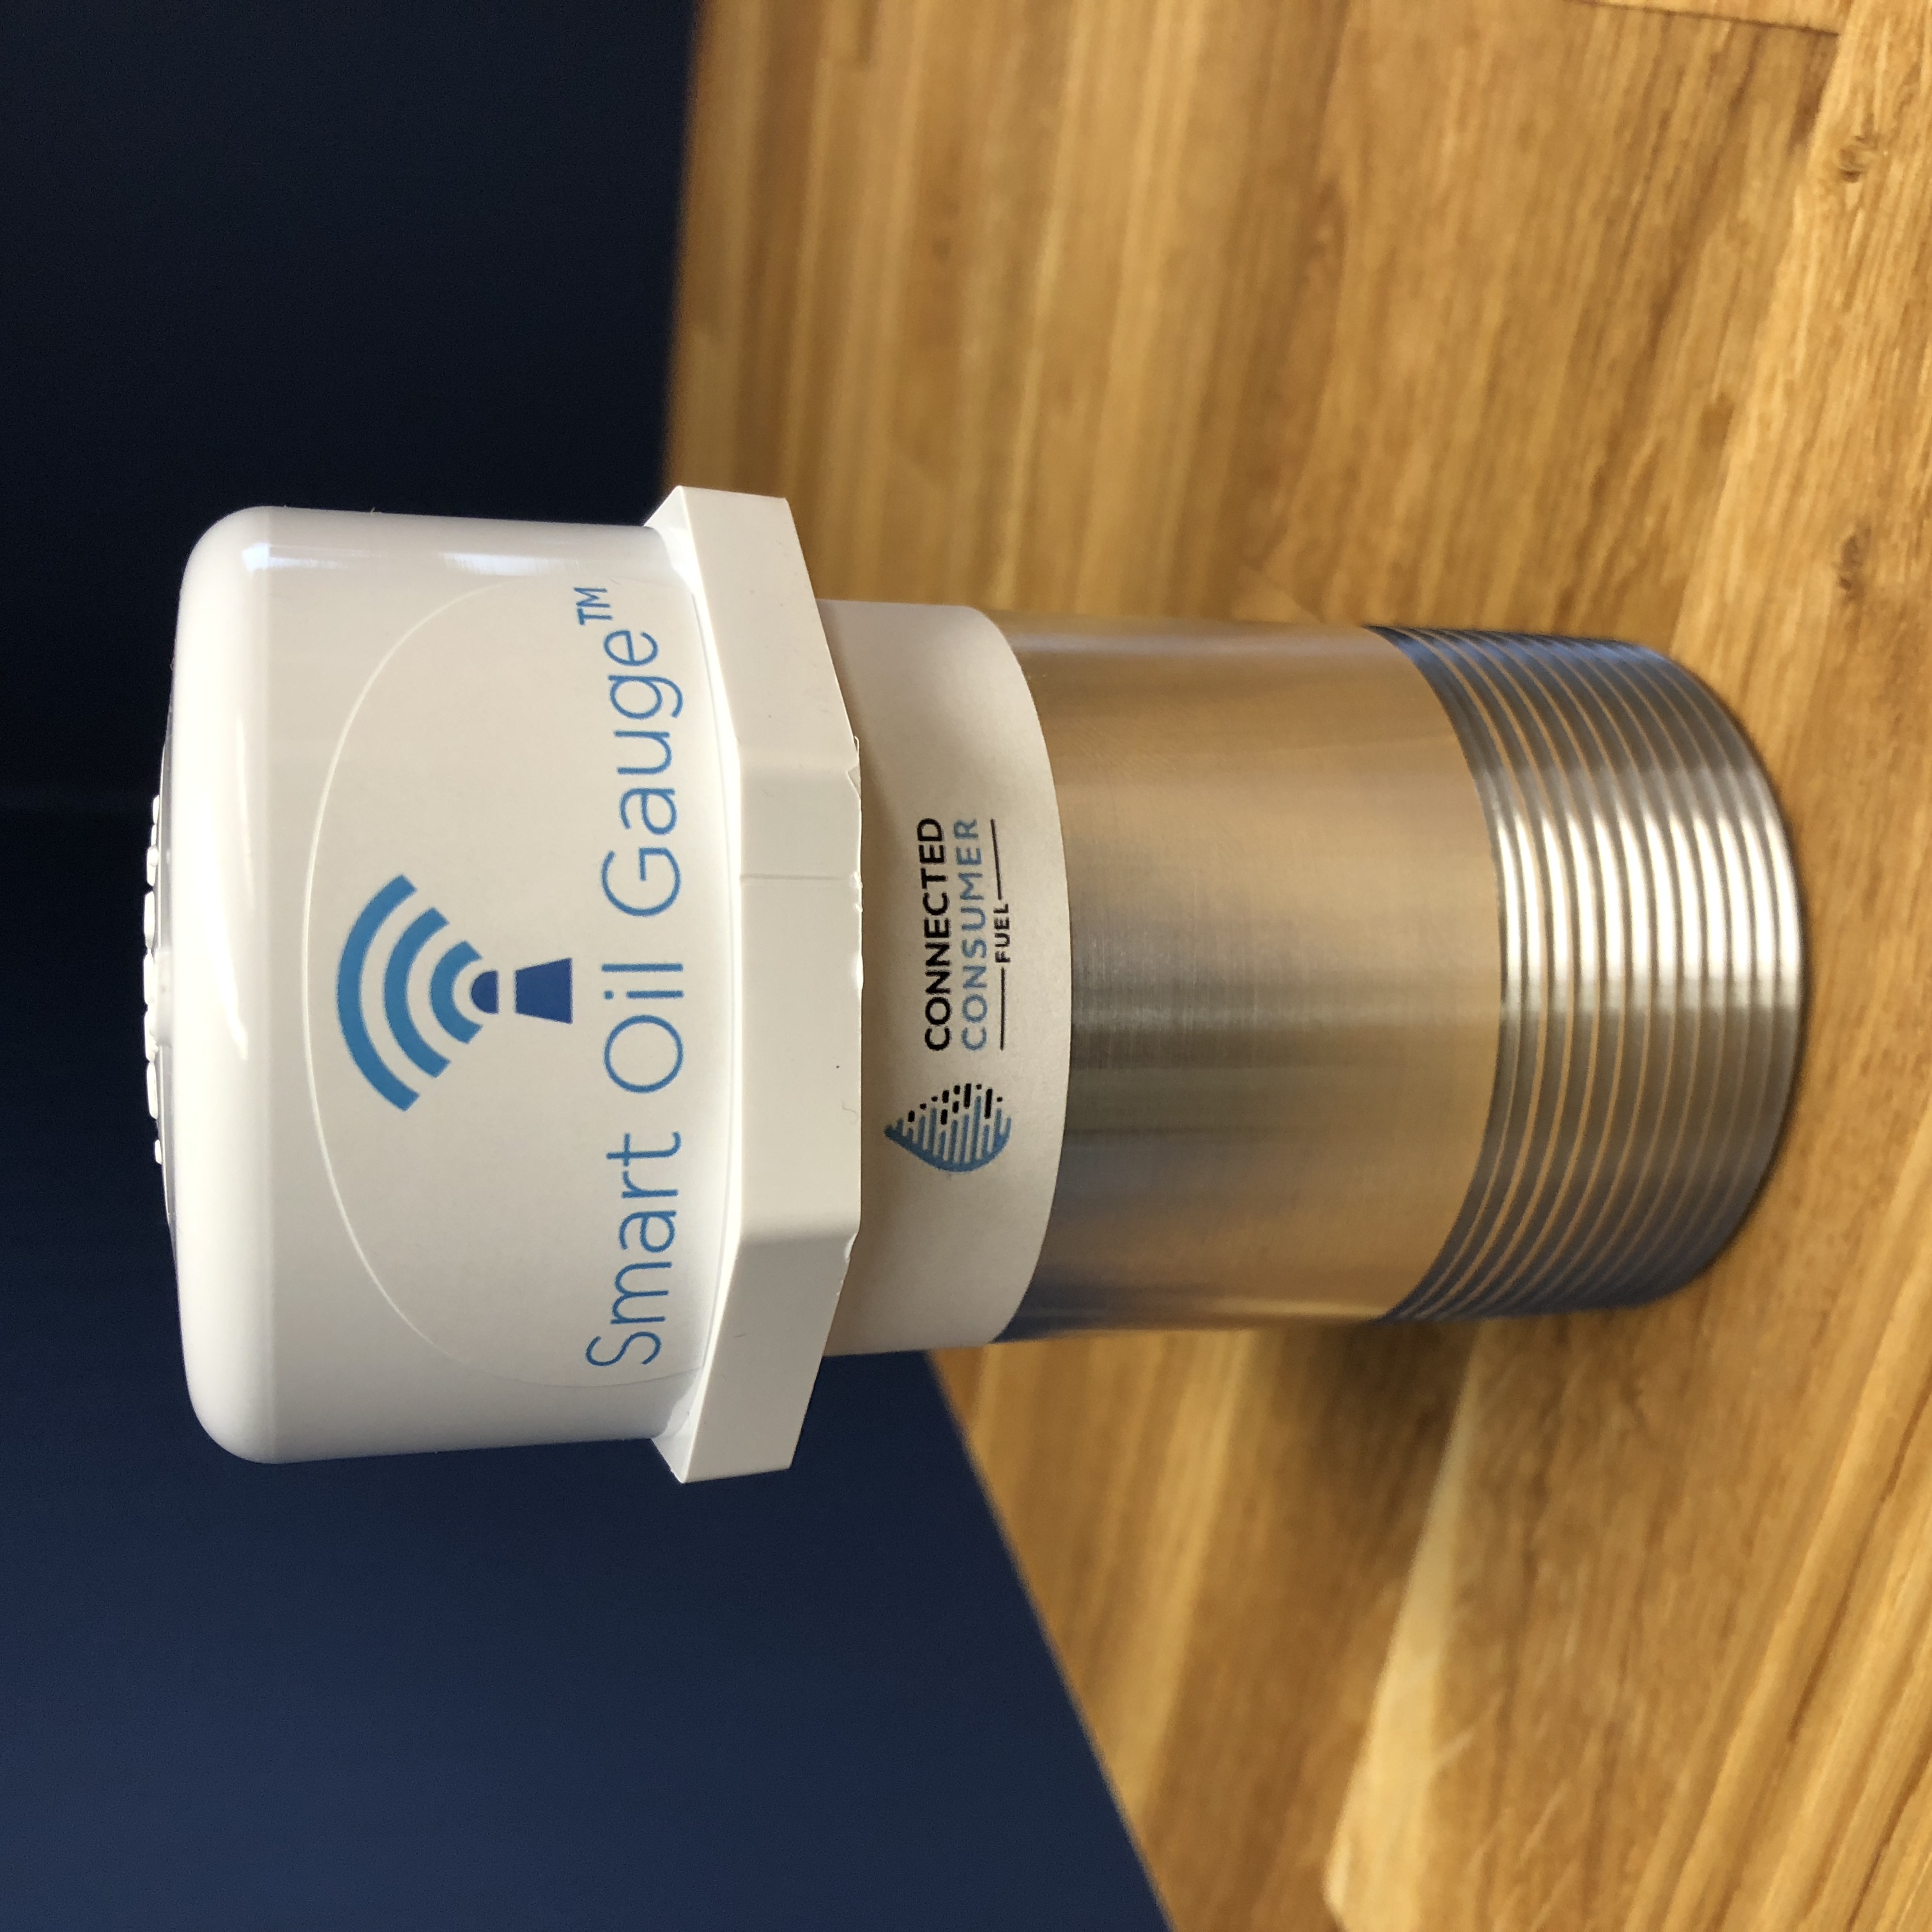
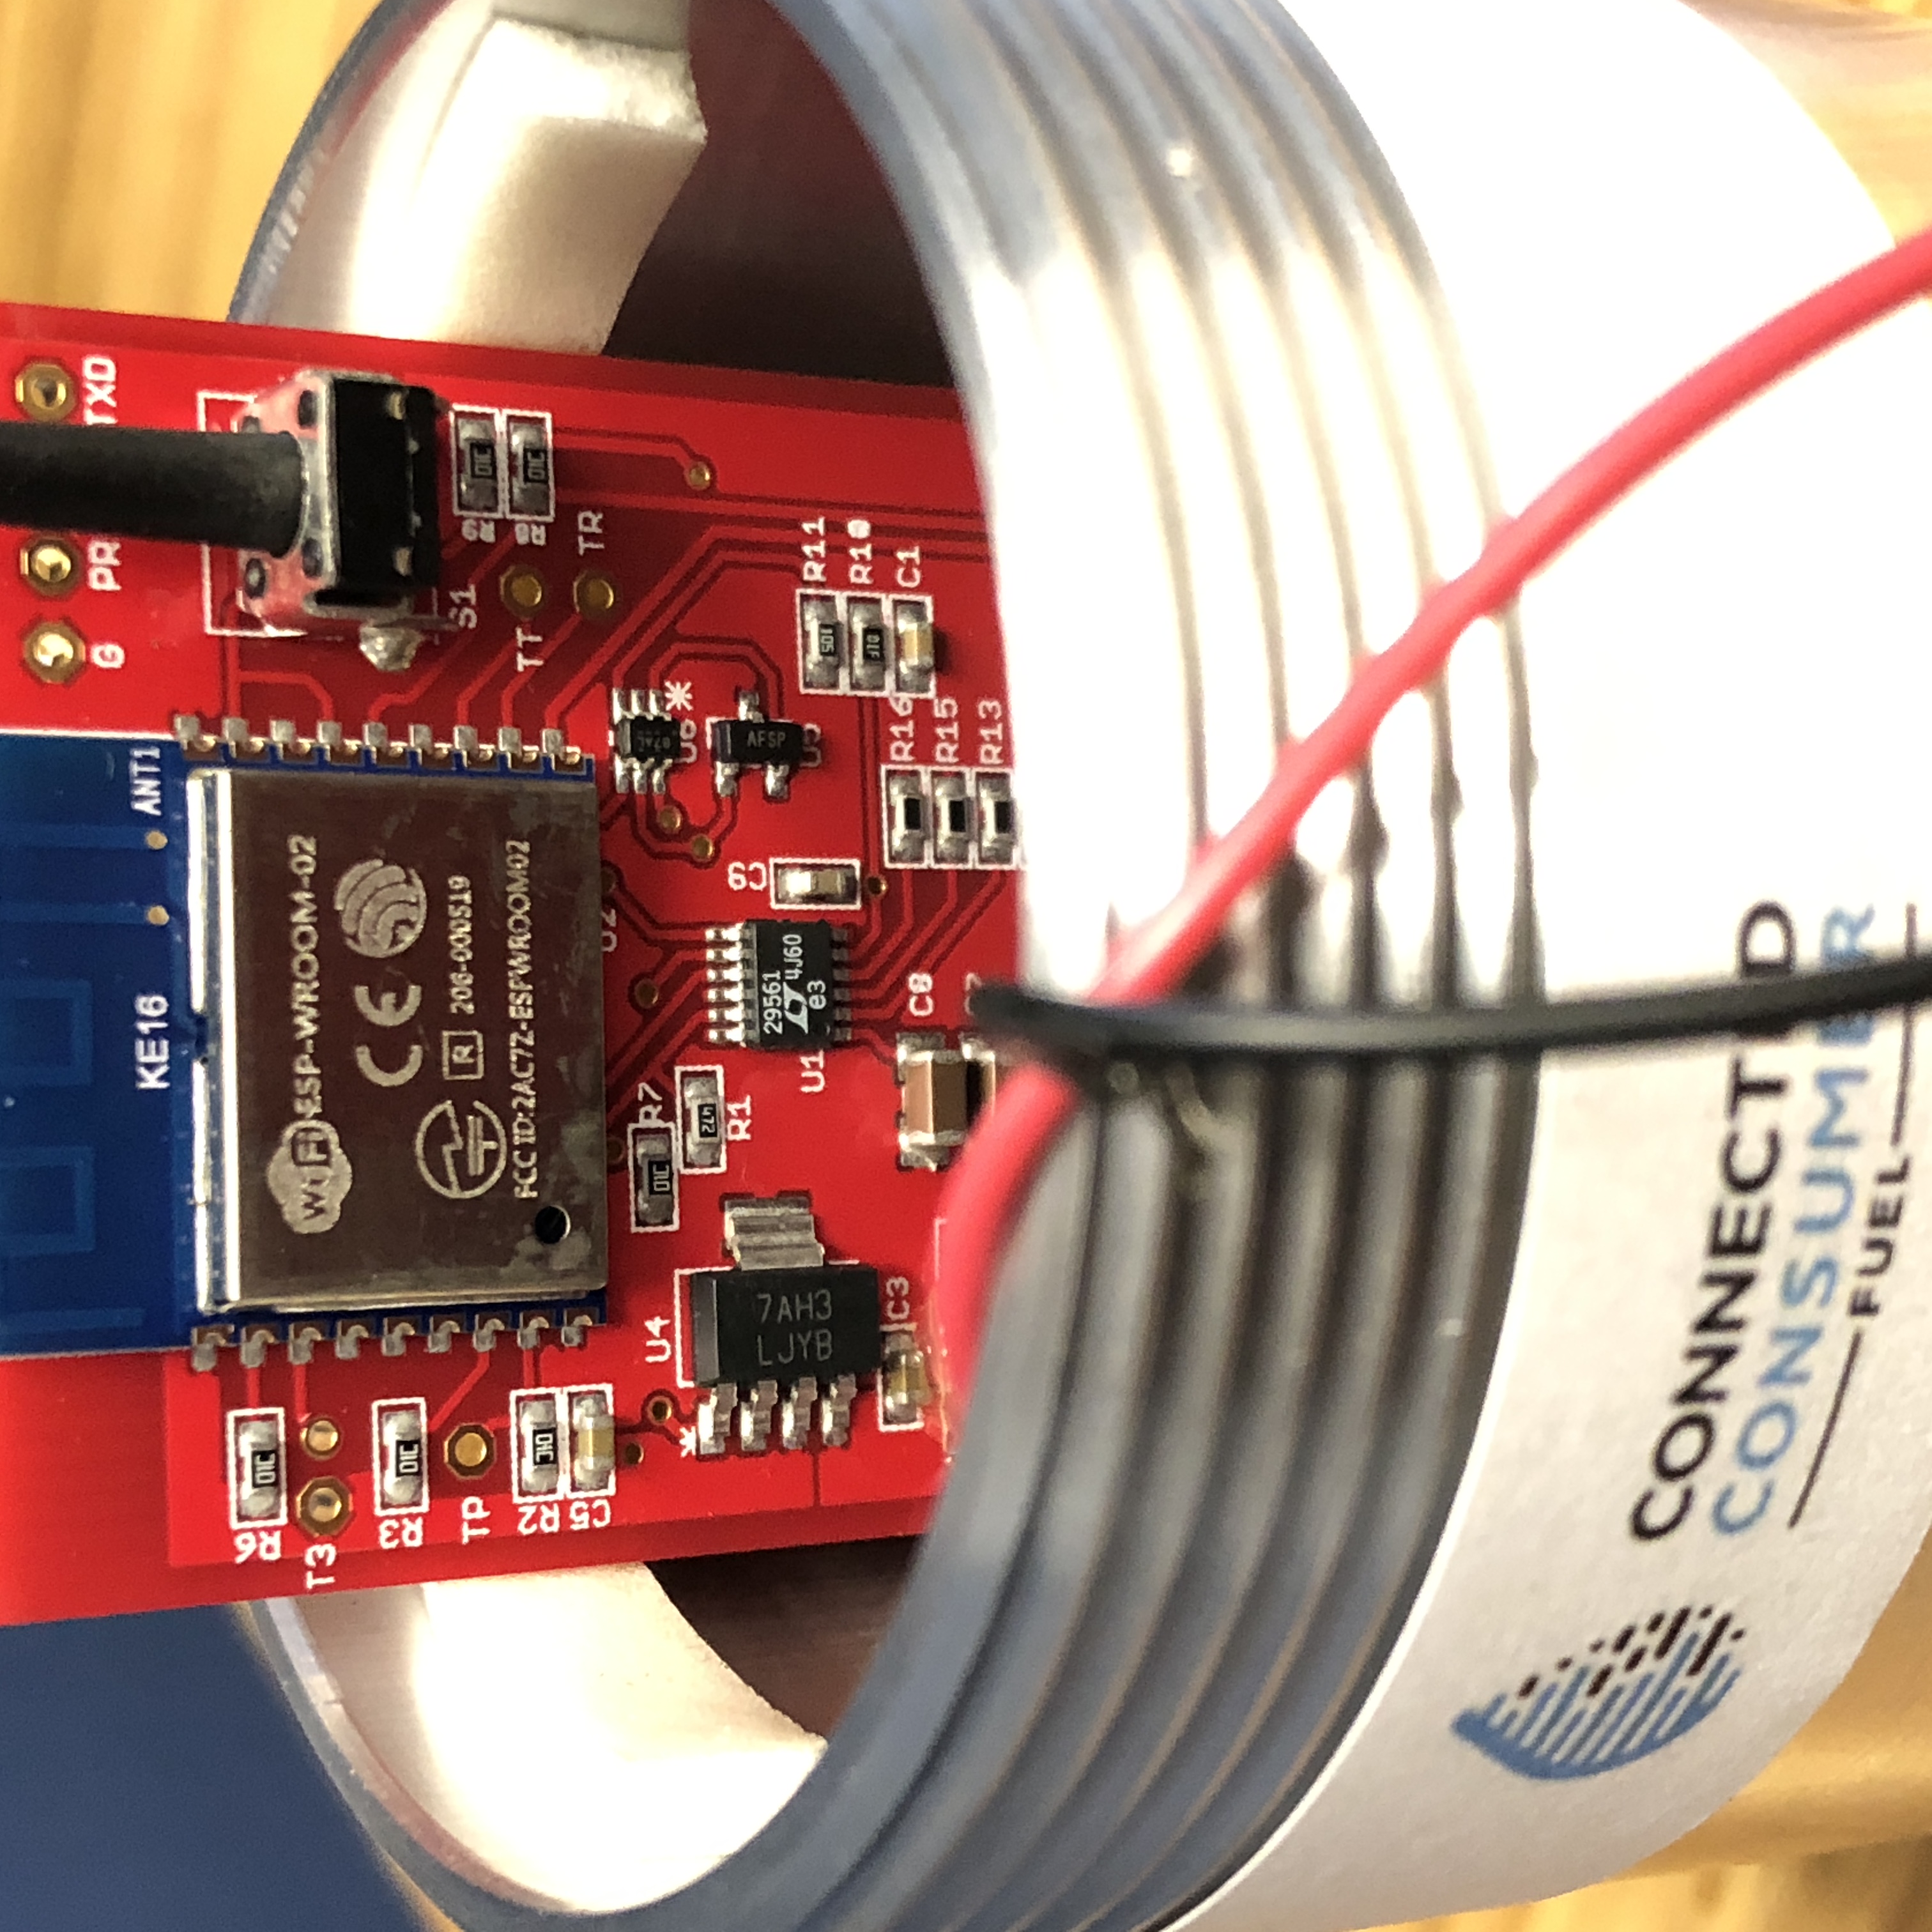
The white cap unscrews revealing a battery pack and the components from the upright board/main board with the WiFi / SOC system chip which is the ESP-8266 .
I ran into a few issues with the SetUp procedure as it requires a few things I was unaware of;
- Phone must be connected to same network the Smart Fuel Gauge is going to use
- Your wireless network must support 2.4Ghz WiFi Legacy mode.
The first issue was easy to correct, I connected the iPhone to the IOT network (where all the other IOT devices live and breath) however I was really unaware of the second bullet.
The iOS application has a simple walk through where it detects what WiFi you’re connected to and asks you for that password and you continue through your installation by turning on the device, making sure its powered for 5 seconds or more and then pressing the configuration button two times, like a double-click of the mouse – but slower. There is an animation that shows you this…
I however wasn’t having any luck.
Troubleshooting and Investigation
I found an older more generic Home WiFi Router (that I had in Access Point Mode) and then connected that to the network, configured it, and then again went through the steps to configure the Smart Gauge. This was a success and proved the Gauge was indeed working.
In my search for settings I stumbled upon some posts about having connection issues with devices – none of these were similar to the device I was configuring. However it all seemed to get stuck on two modes. One of those modes that worked was the mode “Legacy” which would refer to some of the original WiFi devices released that supported 802.11 and 802.11b which are old…
Legacy Mode.
This link to an Intel Support Page (mostly because its the best chart without having to make one) shows that the Legacy mode is one of the lowest data rate in the WiFi 802.11 specifications. This is most likely due to operating off of battery power and just needing to send check-in status packets of the tank level (in a configurable time frame of ‘4’ by default) to the internet.
I made an assumption based on the new Wireless Network that was installed (Blog Post Soon) that something from the NEW system wasn’t allowing this device to connect. I had searched and identified that Legacy Mode was turned off and after re-configuring the network settings I was able to successfully get a connections.
This Will NOT Be Everyone’s Experience
I do not expect that this will be the average home network users experience. Another friend who purchased this based on my Instagram post had an easy set up experience, no network or wireless issues and was done way before I was.
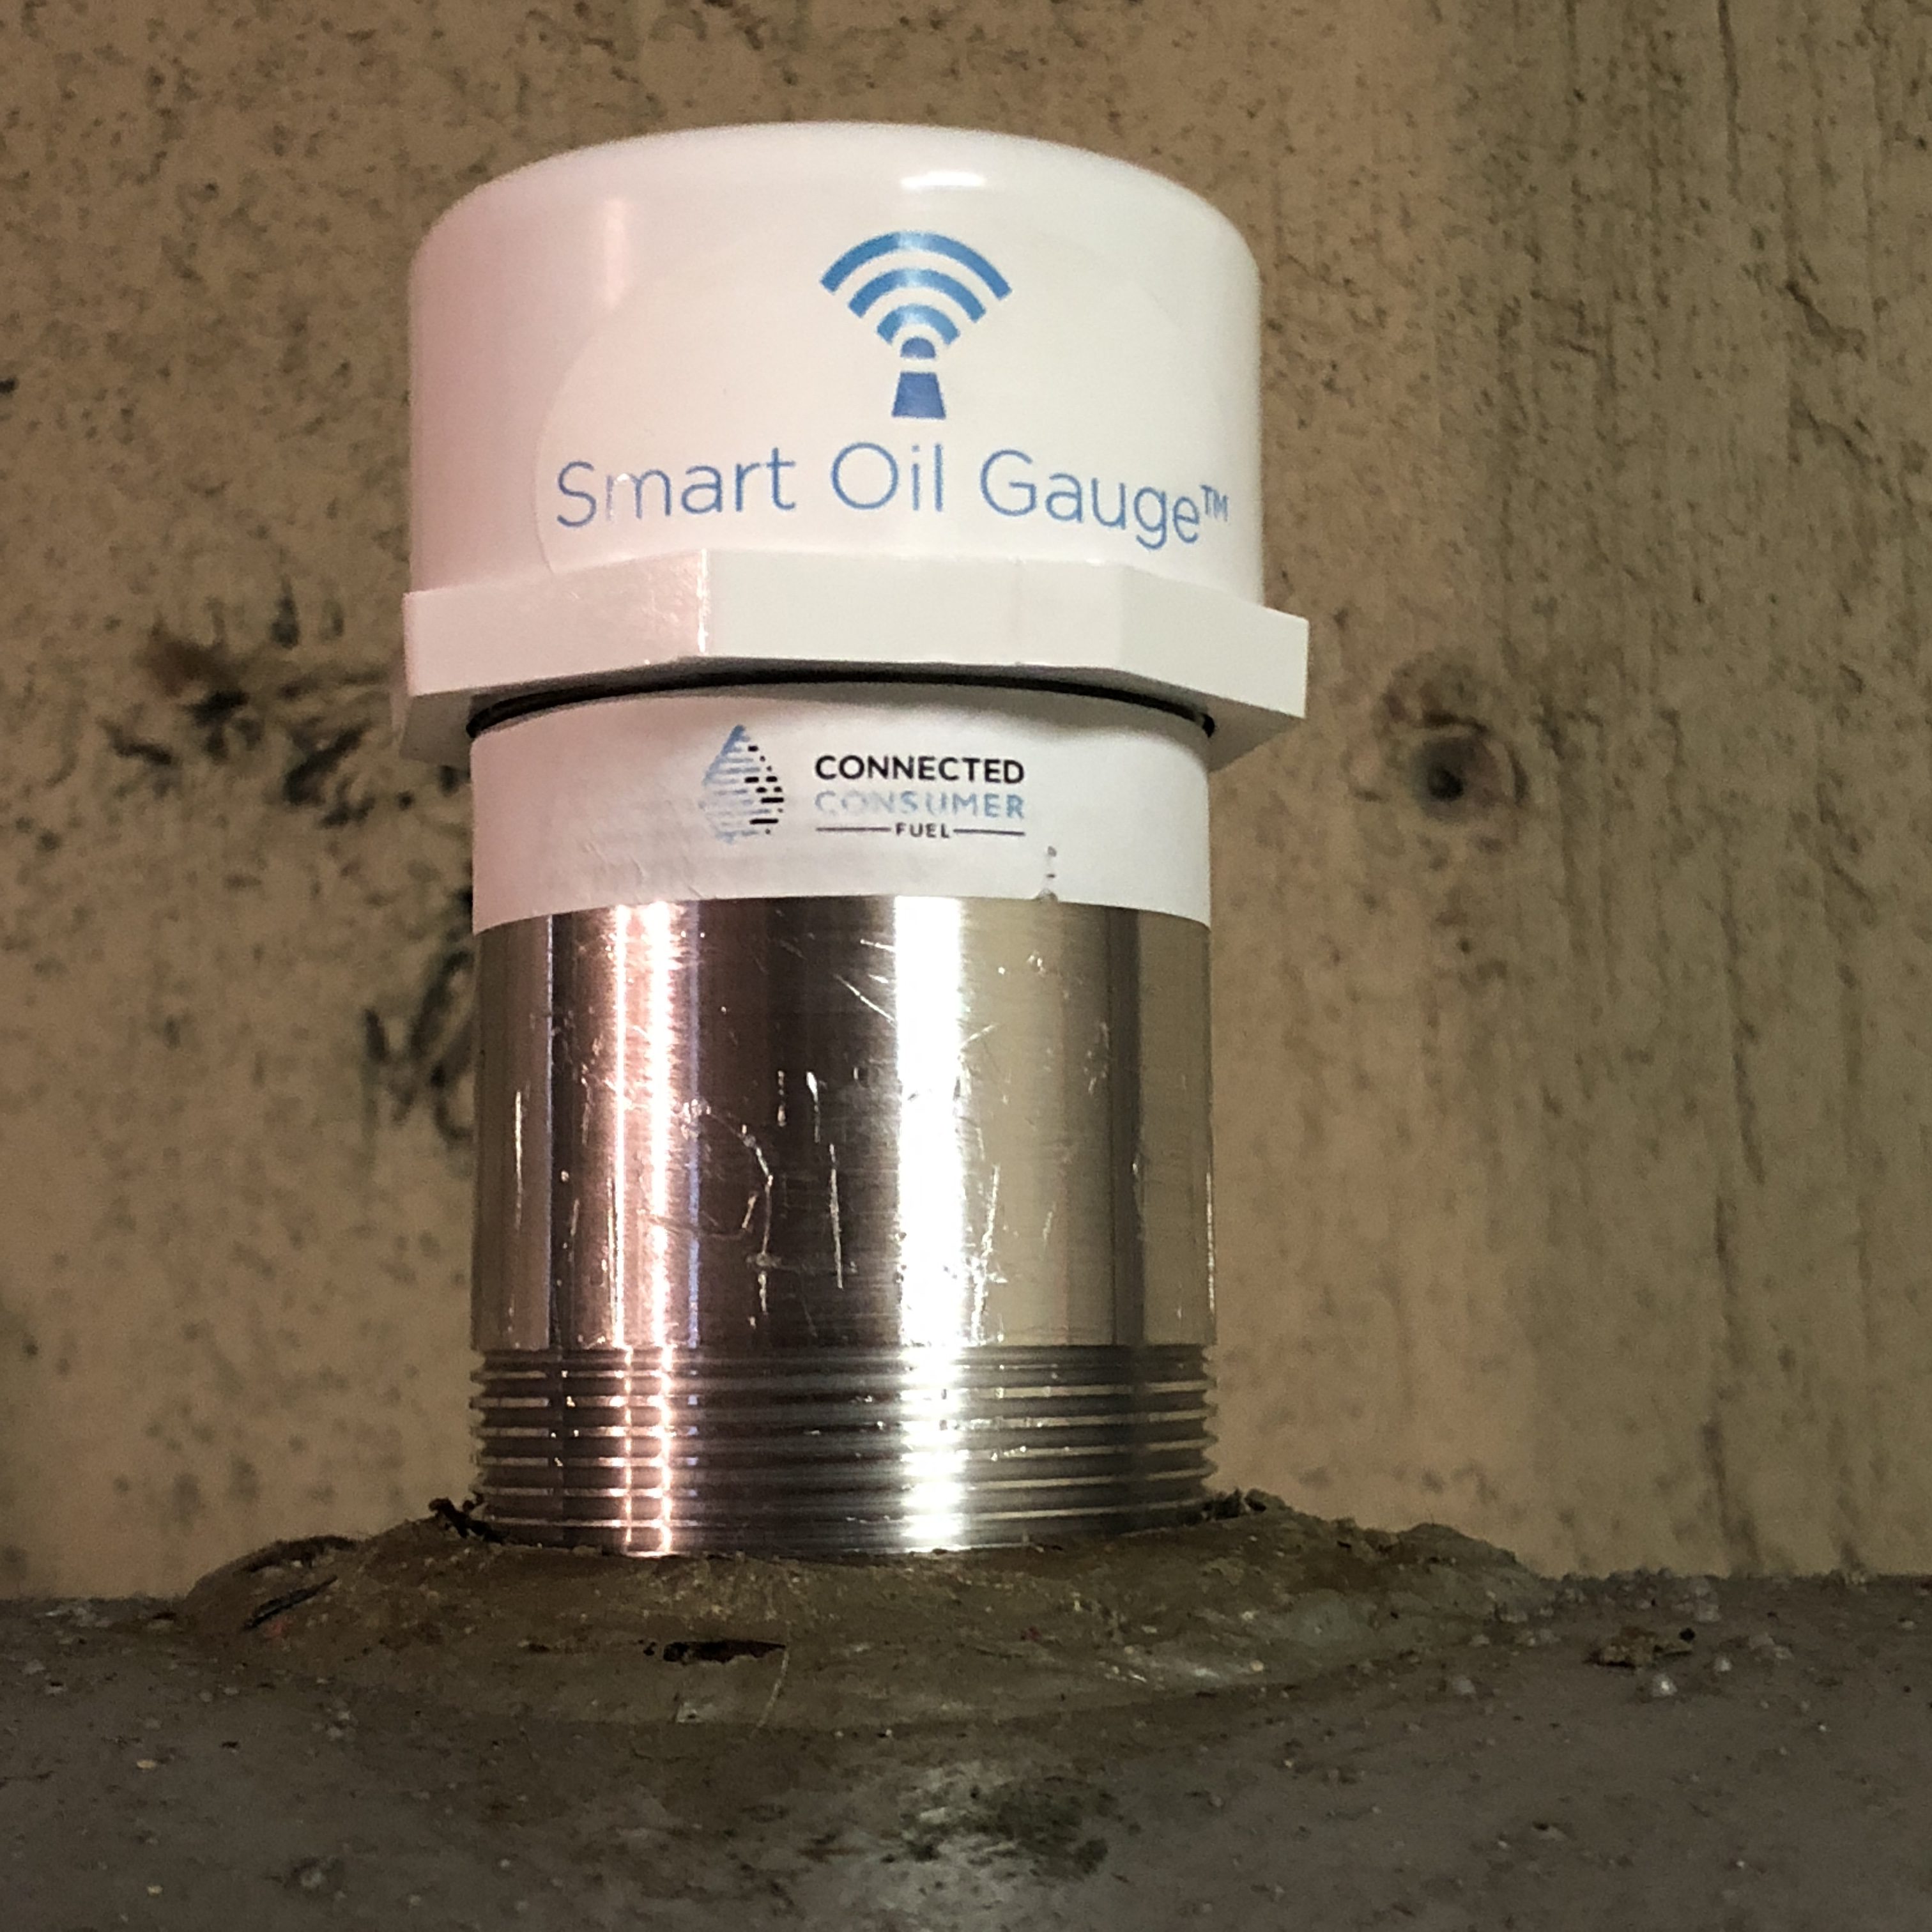
Physical Installation
The Sensor requires you to remove a threaded access port on the top of the tank. These are tanks are meant to really not have any air enter or leave any other place than the vent and the delivery port – so this was difficult. The instructions recommend using a 14″ pipe wrench and I had one of those (for reasons that escape now) and it was really difficult to open. I found a piece of a pipe of place around the handle to obtain more leverage and finally got it to turn.
The stickers aren’t very strong and my hands were a little dirty and the labels instantly went from bright white to dirty gray quickly. For a device that might be used outdoors, there is no way these paper-sticker-labels are going to survive.
I might also have used a rag or something around the pipe so that it didnt get so scuffed and marked up from the wrench wrapped on it to thread it in.
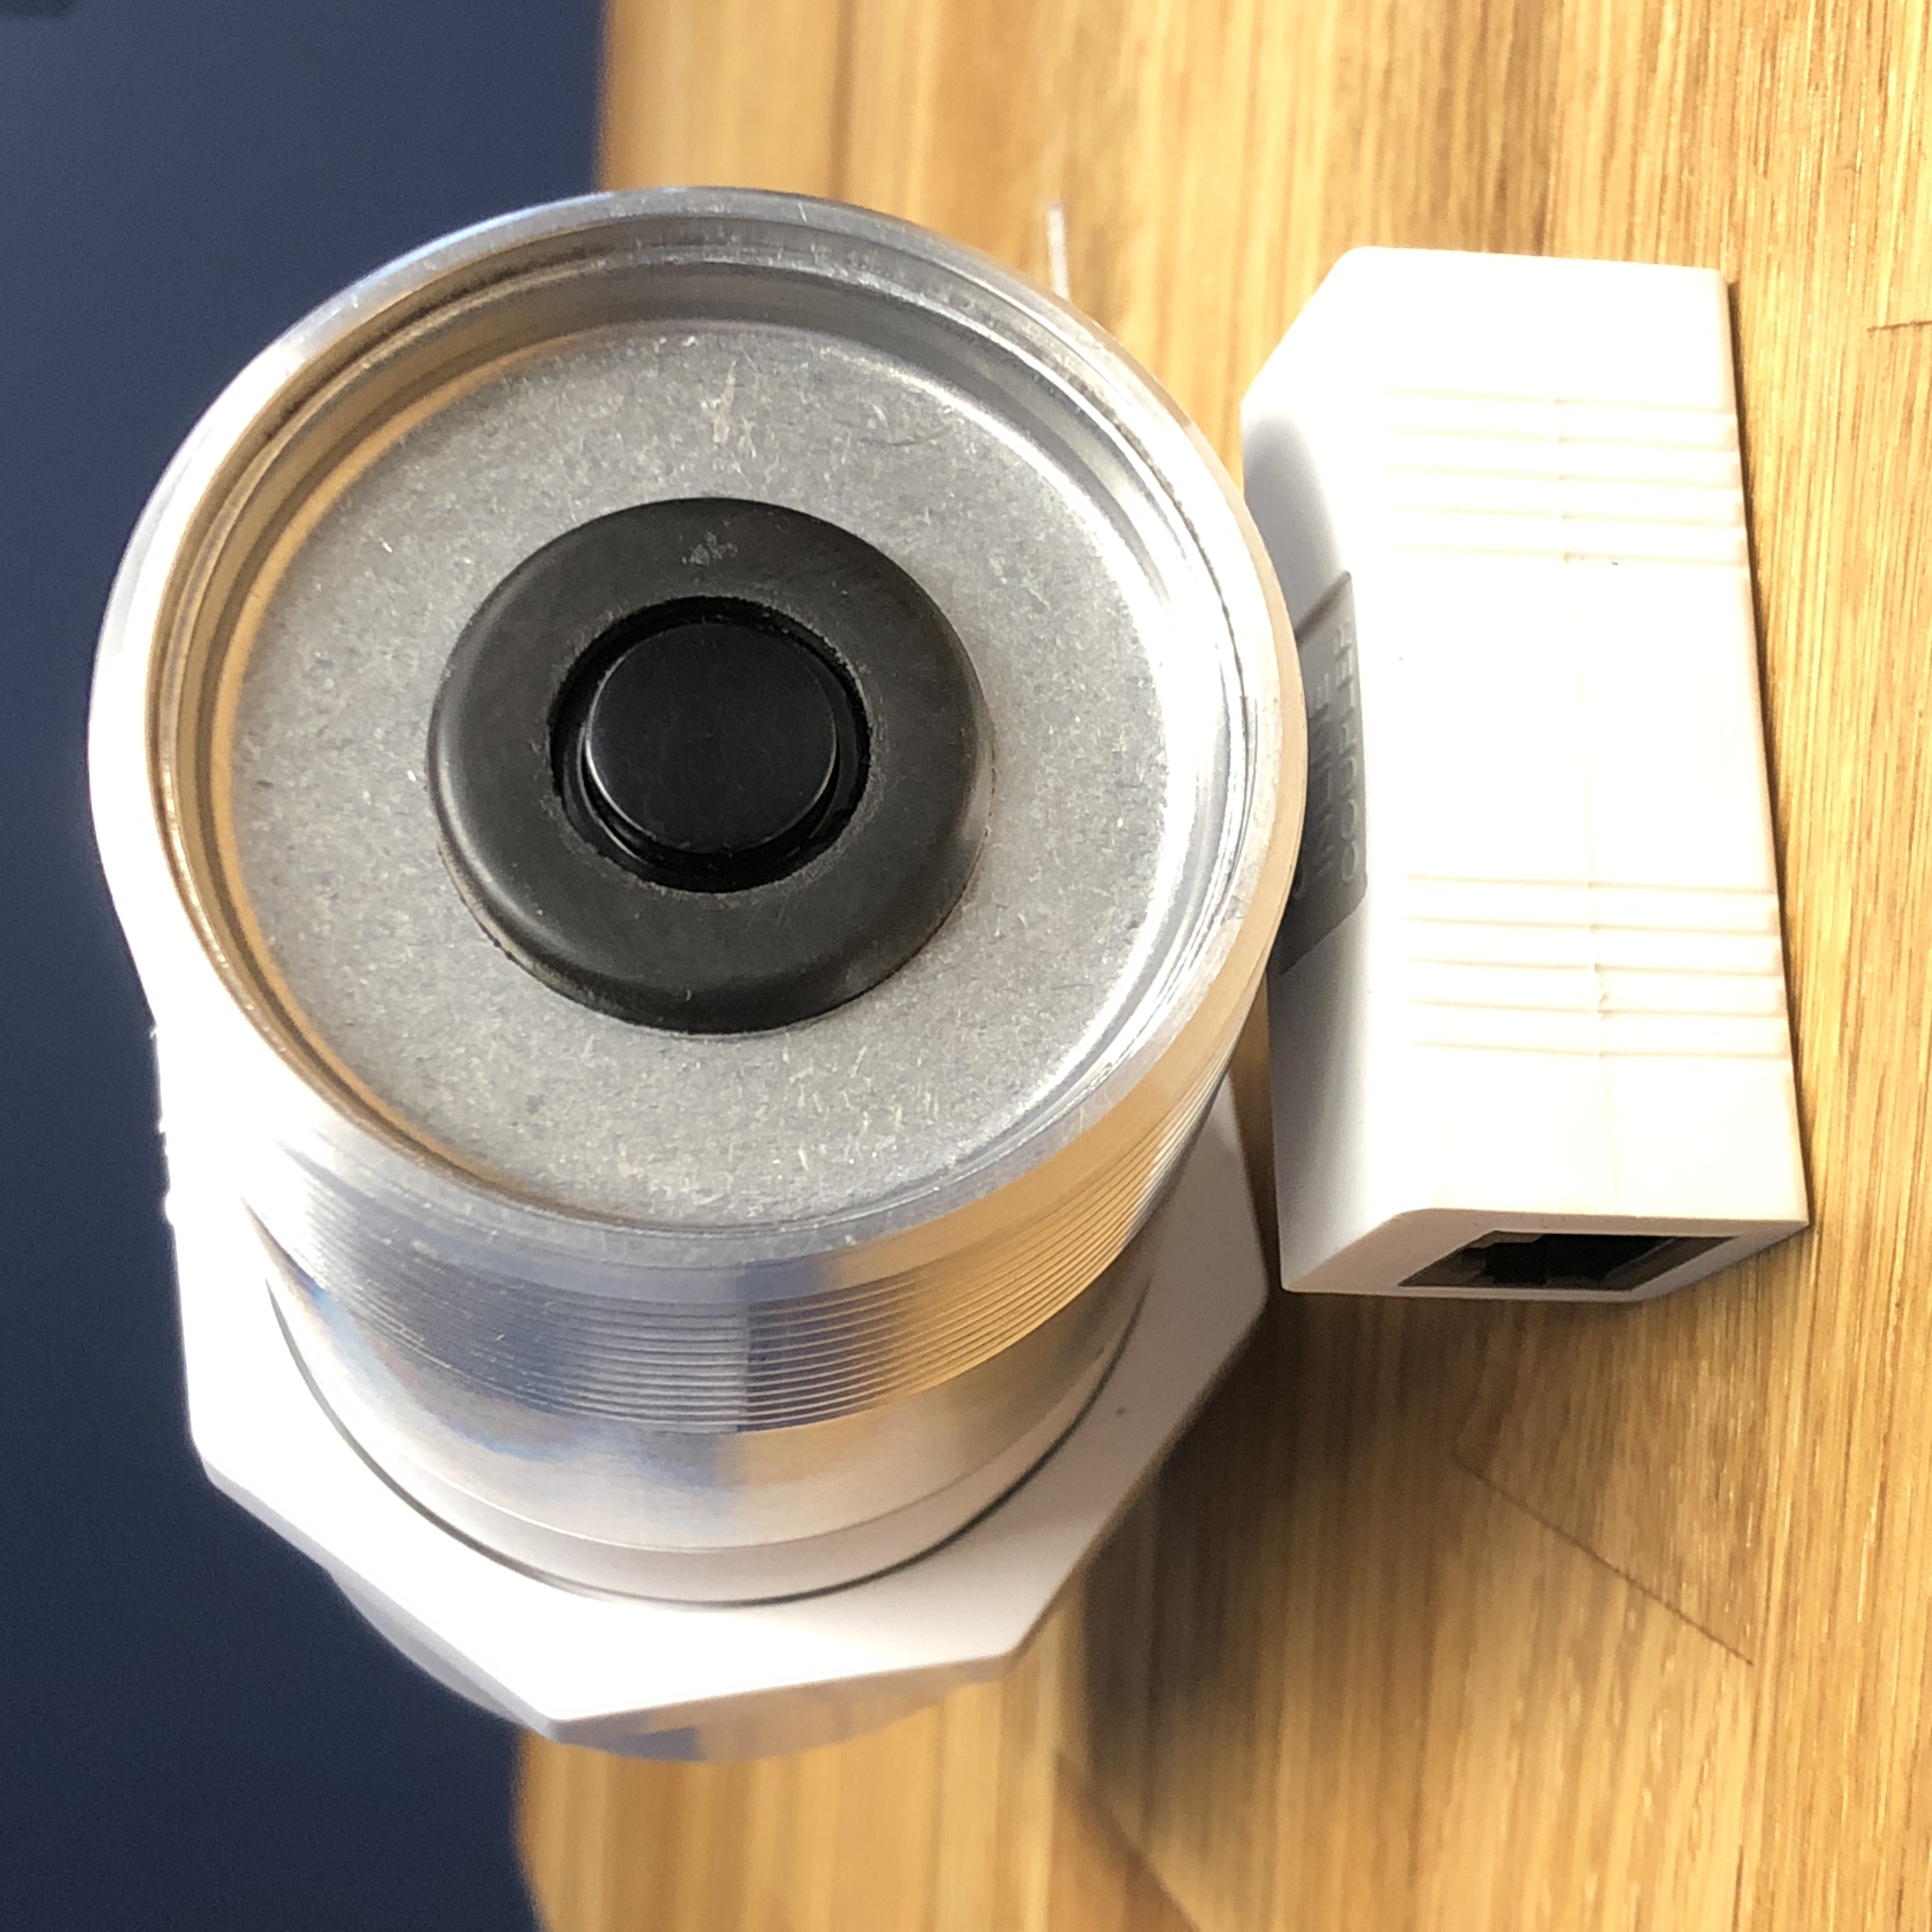
How Does It work ???
On the bottom of the pipe is a sensor that faces oil/bottom of the tank. This sensor really looks like those back-up sensors or proximity sensors on cars to help you park and detect how close you are to something – but I cannot say for sure. Here is a link to parking sensors I found online – Replacement Parking Sensor
Two 3.6 Volt Lithium batteries in the AA form factor power this device and the website states that you may get up to 5 years on those batteries depending on weather experience (cold weather totally wrecks the chemistry in batteries) and the WiFi coverage to the device.
Here is the Frequently Asked Questions Link:
https://www.connectedconsumerfuel.com/faq/
A few years ago I had a tank without any gauge on it and it needed to be constantly monitored with a yard stick and chart to identify the level of oil and capacity. I suspect this device is automating this effort while also logging it to a data source.
Security and Data Information
This device is sending data up to the internet (network investigation to happen soon) and while its providing you the data for your information – it has access and can attempt to make the data not personally identifiable but the website doesn’t really make it clear what the company is doing with the data.
While it is connected to your network – it’s not on it very long – its making difficult to trap or capture the data and also makes it difficult to port scan it see what is open. From the FAQ section there is a reset config setting that allows the Smart Fuel gauge to move to an AdHoc mode. This allows you to connect your device to it and then browse a website to configure the connection.
All of this requires physical access to the device, which for me is inside my home, making it less likely the device could be compromised and used to attack or obtain access to my network.
I will follow up with more information as my experience continues.