Hak5 Coconut Antenna Mod – Easy – but be careful.
Do this at your own risk – don’t call me with your broken boards and connectors ripped off.
Be
Freaking
Careful
If you’re here – you most likely already know what this is – but – check out the product here: https://shop.hak5.org/products/wifi-coconut
Flip it over, and pry the upper housing off the base. There are pressure tabs all around – this can be done with a strong finger nail, but I don’t have those and I also wanted to take a photo. Pry it to the side, lift the top up and work your way around the whole coconut. The bottom plate is flat and separates very easily.
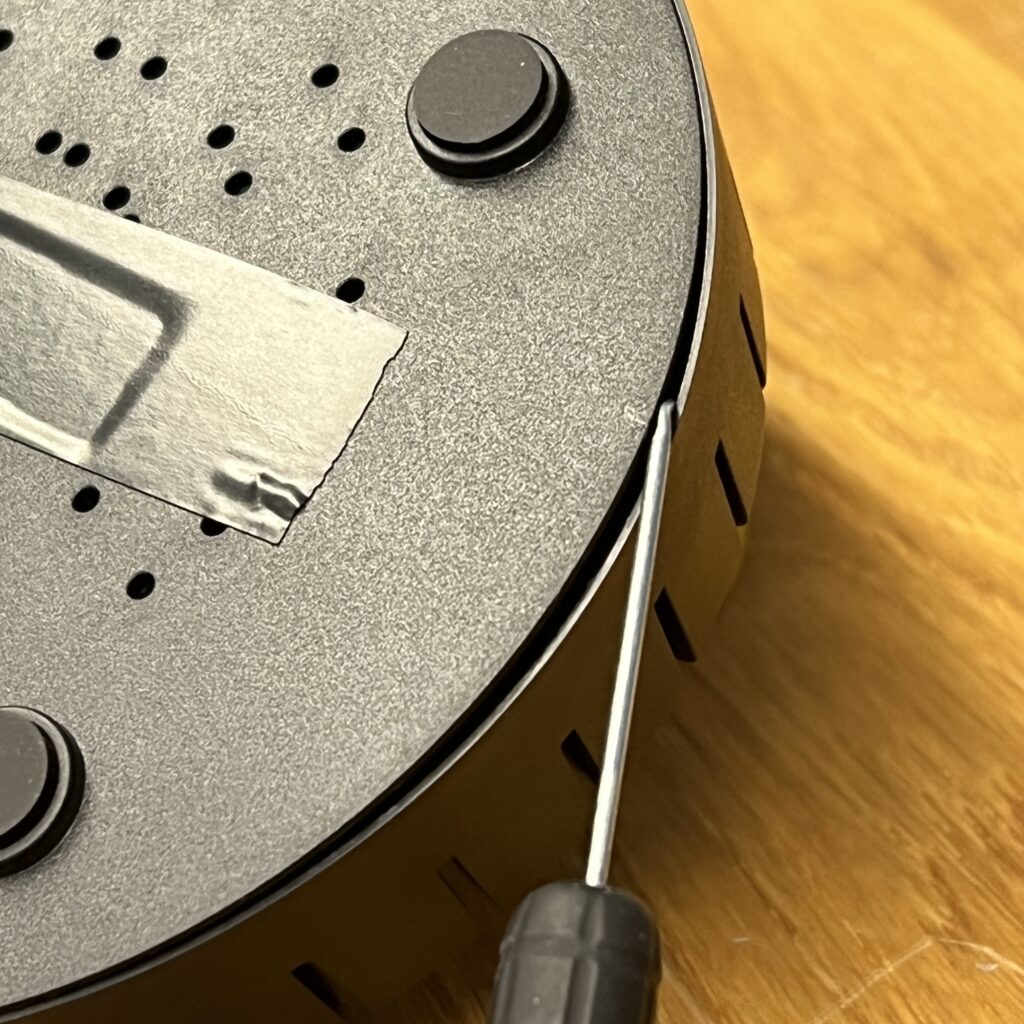
Once the bottom plate is removed – unscrew the two screws and slowly life out the PCB. There is an Antenna wire and fan power wires there – just slowly open that up.
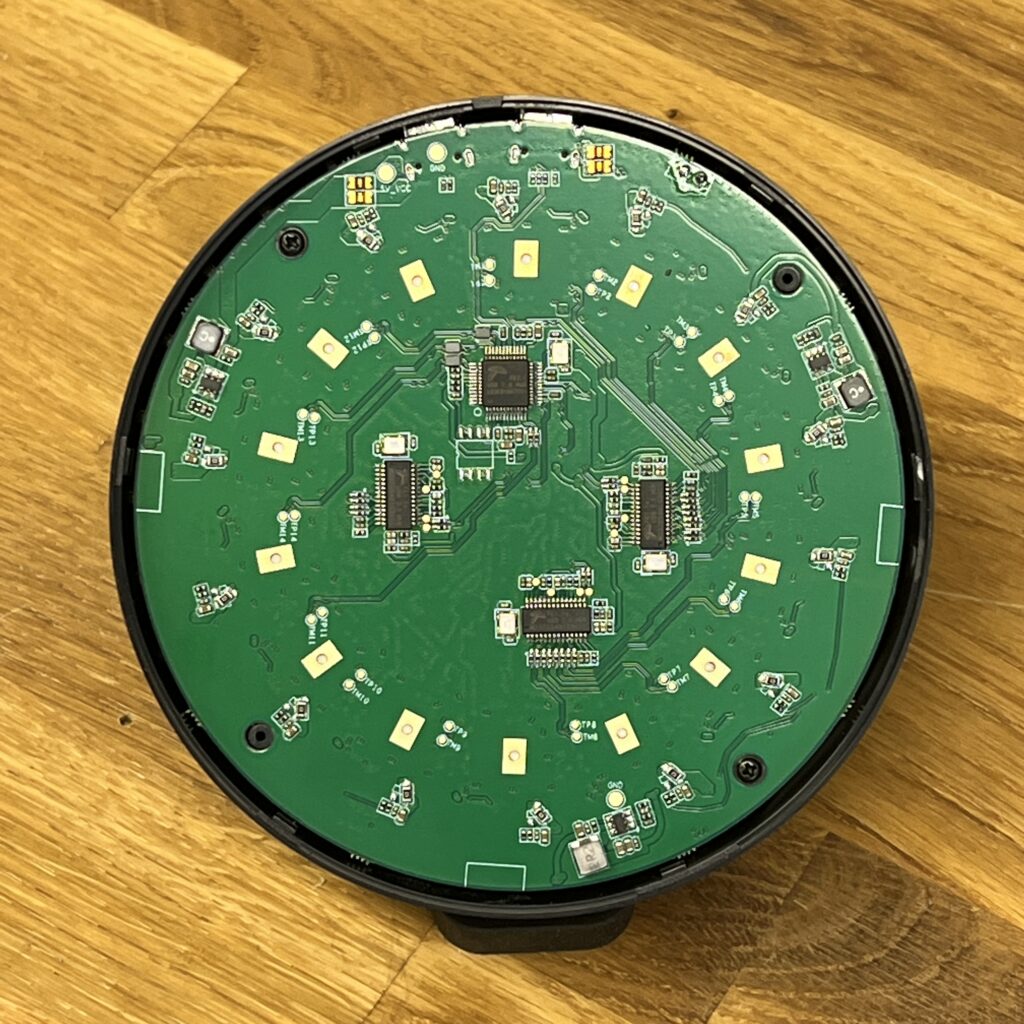
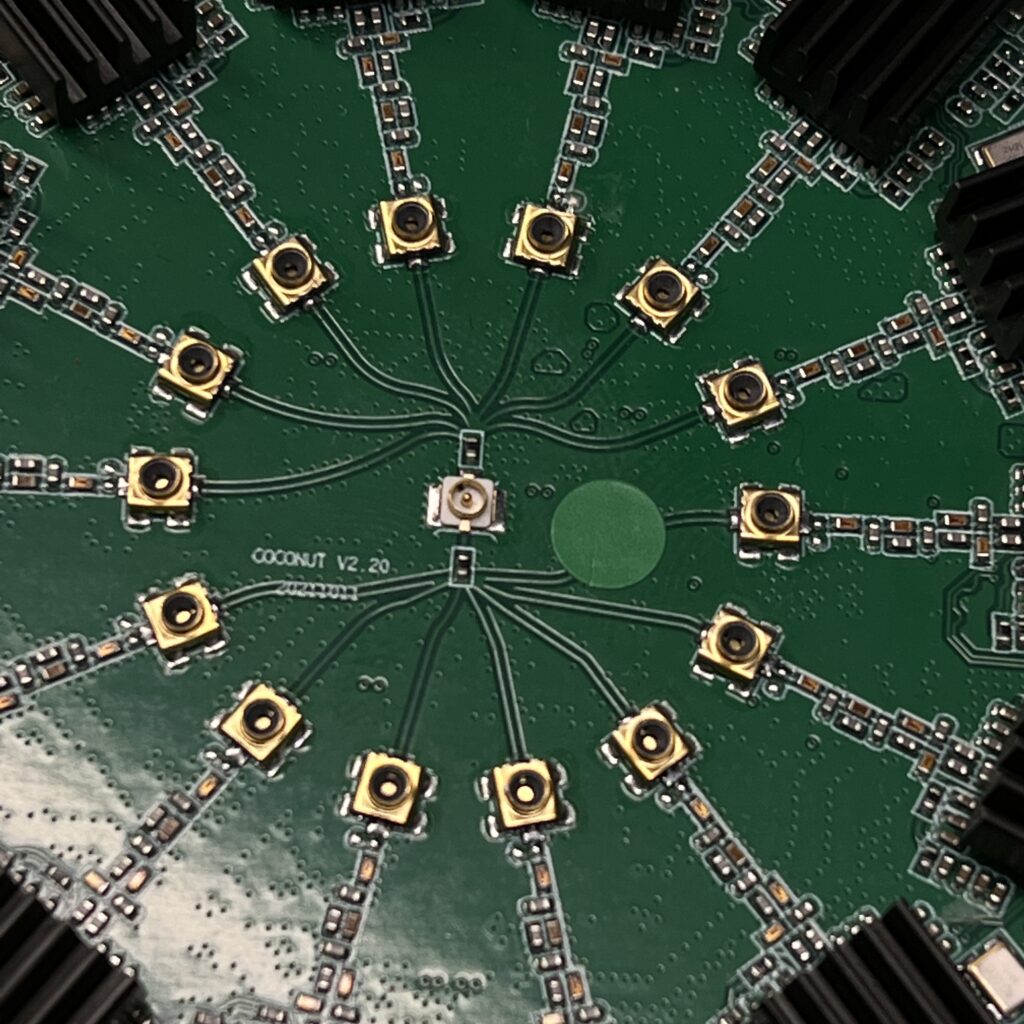
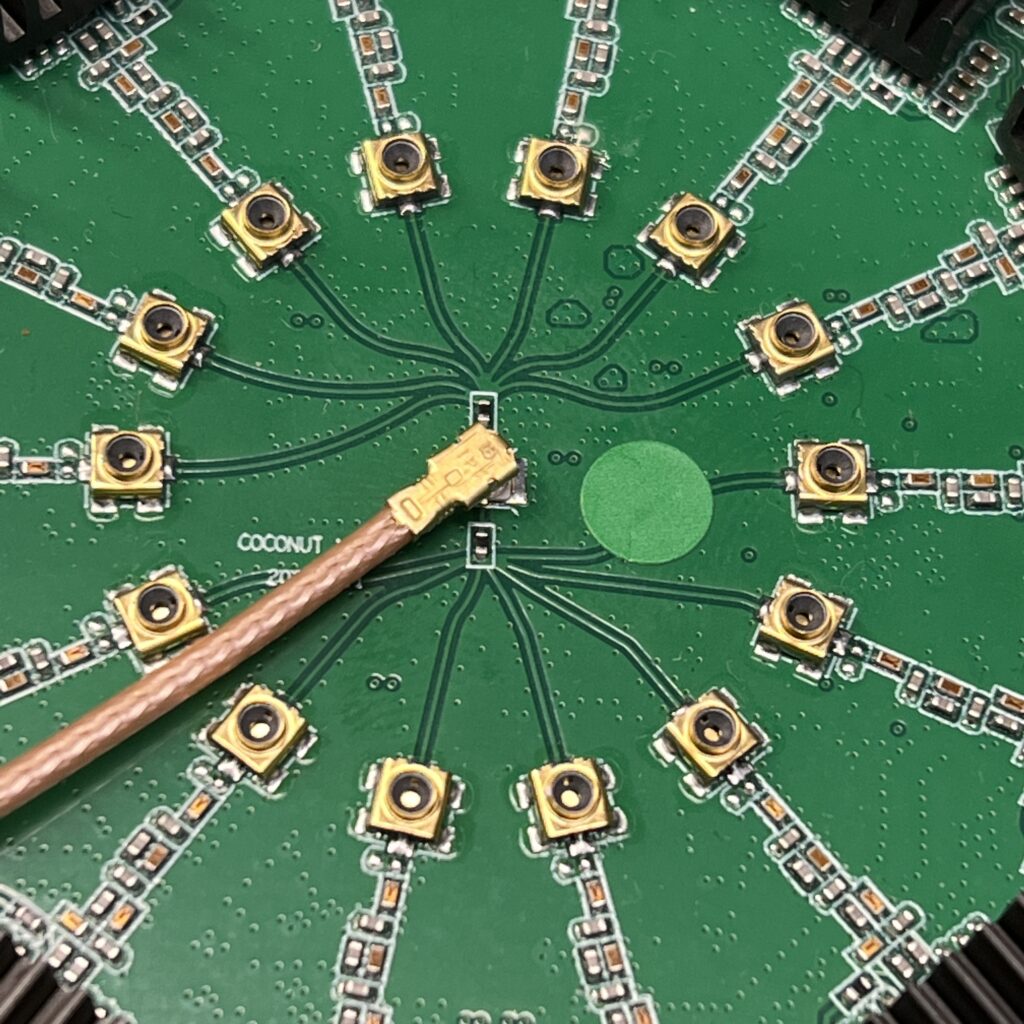
Once the PCB is carefully pulled form the top housing you and see that single antenna cable on the center pin. I don’t know what magic this is – how 14 Radios share a single antenna – just stop telling me we can use the other 14 connections – cuz I already thought that and its basically wrong.

OK – so – my first coconut didn’t fair well for this part – so I can say that you must be absolutely EvendyBillion Percent careful on removing this connector from the PCB – slowing pull up on the connector without applying to much tension at an angle and pop-off the connector wire.
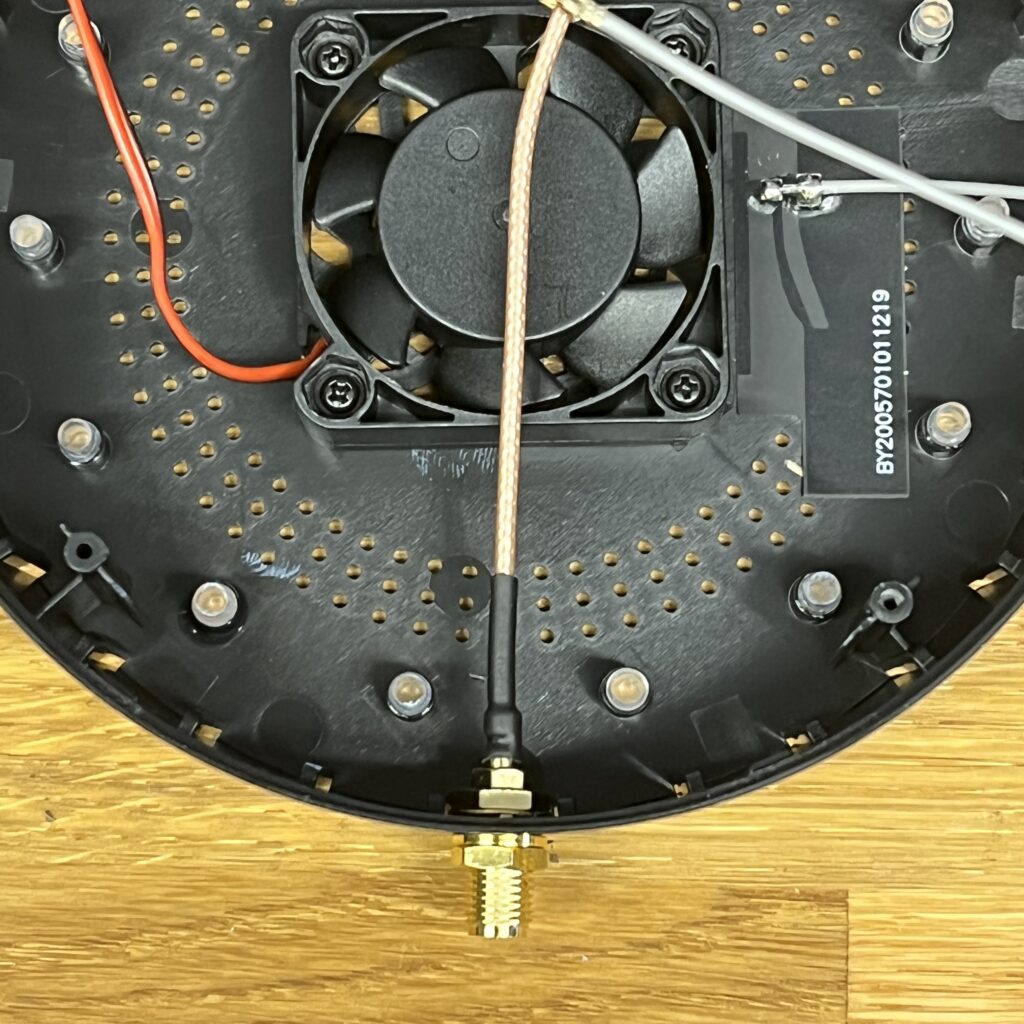
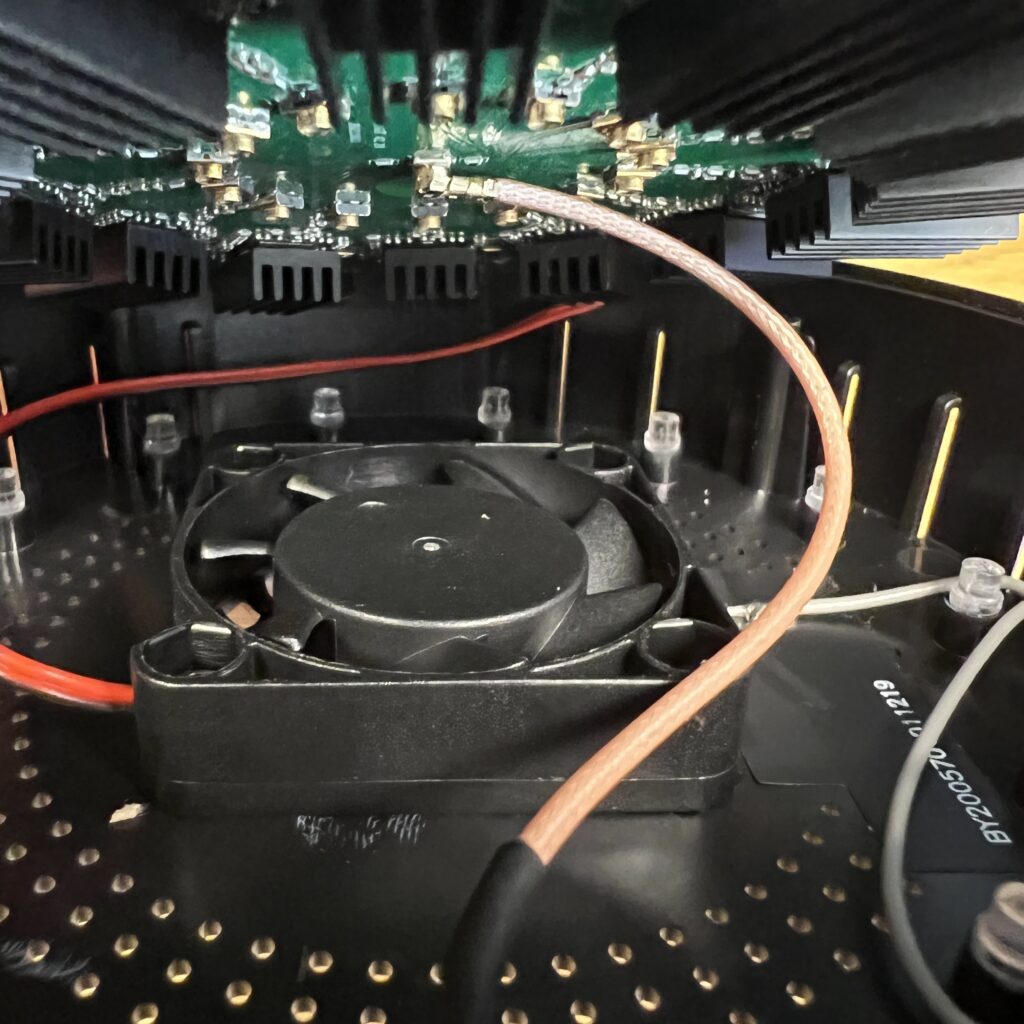
You can peel off the original antenna – which once you do that you can never really use it again – or wrap the wire close to the fan and tape. You kinda want that existing antenna wire to not eventually make its way into the fan blades.
Here we have the single u.fl antenna connector. I used this part from amazon for my u.fl connector to rp-sma antenna cable;
(Not an affiliate link or anything, I just searched my orders and copy and pasted this link)
https://www.amazon.com/dp/B07H3P9KDQ?psc=1&ref=ppx_yo2ov_dt_b_product_details
UPDATE – In further thinking of this – this type of connector might be better as it is smaller gauge wire and less stressful on the connector. I might swap mine out for this one – https://www.amazon.com/dp/B07C26DR8C?psc=1&ref_=cm_sw_r_cp_ud_dp_J76HFMQM89H3ZXH2BV1G or this one https://www.amazon.com/RP-SMA-Female-Pigtail-Antenna-Coaxial/dp/B07C26DR8C/ref=sr_1_2?crid=2WGOJ7BJQWLND&keywords=u.fl%2Bto%2Brp-sma%2B10cm&qid=1661808063&sprefix=u.fl%2Bto%2Brp-sma%2B10cm%2Caps%2C57&sr=8-2&th=1
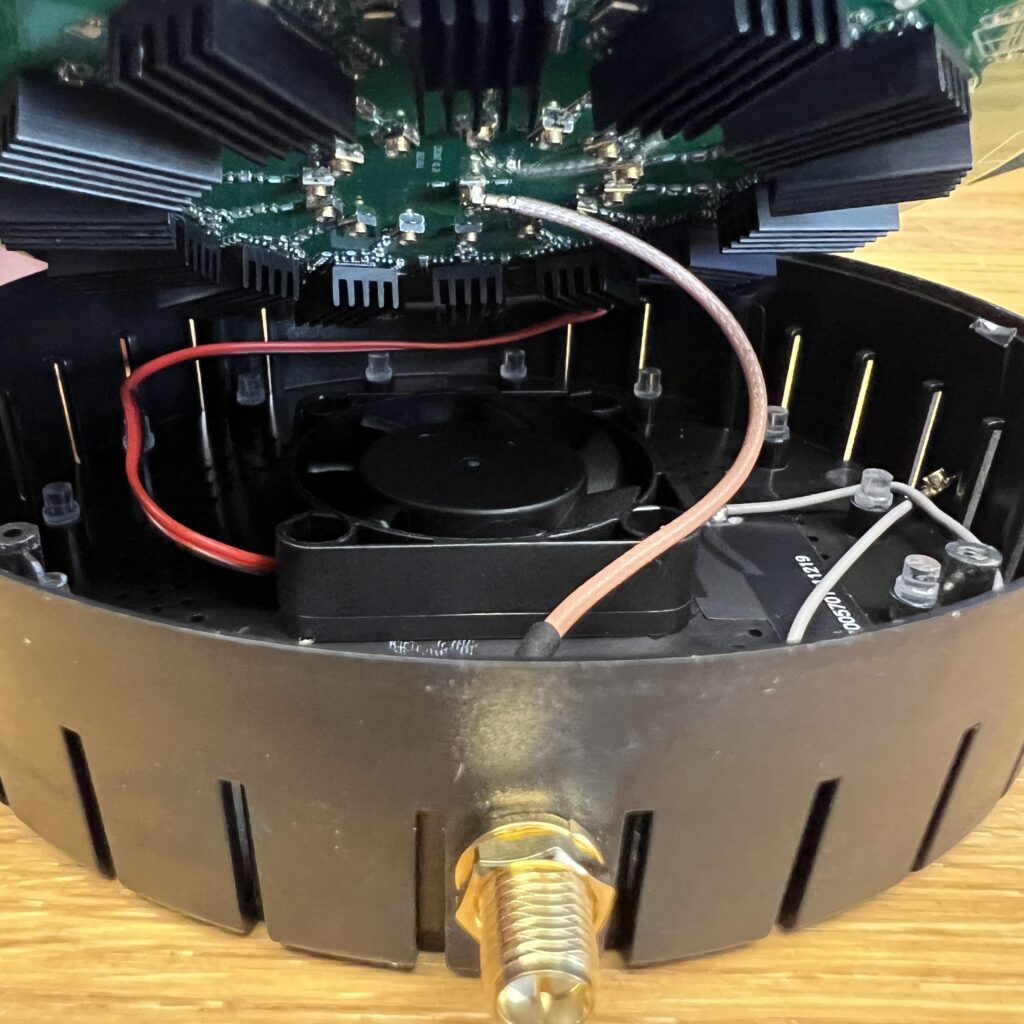
Drilling the hole – I wanted it to be on the opposite of the USB-C connections, this doesn’t line up with how the radios and heatsinks on the radios are and can cause conflict – you will most likely need to come out the side wall at the upper area of the coconut so case so you can clear the radios and heatsink.
I used a 1/4″ drill bit and carefully put a hole in the side. Be vewy vwey careful, you can pop that drill out the other side and cut into things… so just go slow.
I am not sure how to articulate this – however you must review all the surrounding areas and see where you want this new cable to exit and decide on where you want to make the hole for the bulk head rp-sma connector. More photos to follow on how I set mine up – but you just want be very careful and not put too much stress on the connection as you start work on assembly.
It’s stressed a bit
I tried my best to wrap the existing wire cable over to the side and it seems to stay well. Here is an inside view as I close the coconut up and how I tried to get that new antenna wire into the case and bend and wrap around the fan to be out of the way. Maybe a smaller gauge antenna wire would be less stressful.
Screw the PCB in and then pop the back on. It has a key notch on it so its going to only go back on a specific way.
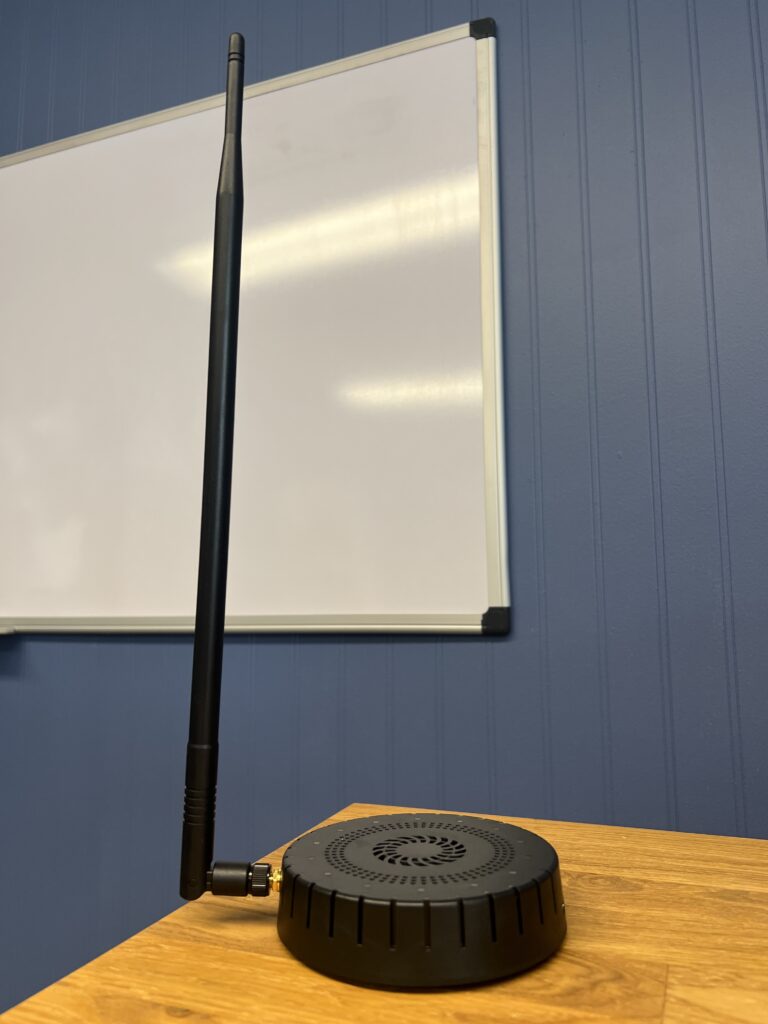
Finished. Go Find all the WiFi’s. Go Listen to all the WiFi’s :)